close
Choose Your Site
Global
Social Media
Views: 0 Author: Site Editor Publish Time: 2026-10-26 Origin: Site
The transition from mechanical locks to smart access systems gets marketed as a seamless plug-and-play upgrade. The physical reality of door modification tells a different story. Buyers frequently purchase smart access devices only to discover their existing door preparation, deadbolt type, or frame alignment is incompatible. This mismatch leads to compromised security, jammed motors, or complicated return processes. While many standard installations are beginner-friendly projects taking under two hours, unforeseen alignment issues quickly escalate the difficulty.
Successfully upgrading requires a systematic approach. You must evaluate your current door hardware objectively. Understanding the technical differences between retrofit and full-replacement models prevents wasted time and ruined materials. Executing a precise installation ensures reliable automated locking. We will walk through the exact field methods used to assess entryways, modify frames, and install motorized deadbolts without destroying your door.
Compatibility Dictates Options: Your existing door’s backset, thickness, and lock type (cylindrical deadbolt vs. mortise) strictly limit which smart door hardware can be installed without heavy carpentry.
Alignment is Critical: Smart locks lack the tactile feedback of a human hand; even a millimeter of friction in the strike plate will cause motor failure and rapid battery drain.
Retrofit vs. Replacement: Retrofit models utilize existing exterior cylinders to maintain key compatibility, whereas full replacements offer higher ANSI/BHMA security grades but require complete door hardware removal.
Protocol Selection Impacts Infrastructure: The choice between Wi-Fi, Z-Wave, Zigbee, or Matter determines your lock's battery life, integration capabilities, and reliance on third-party hubs.
Table of Contents
Establishing the physical baseline of your door before selecting a smart lock prevents installation roadblocks. You must measure specific dimensions and identify the exact mechanical lock type currently in place. Guessing these measurements results in purchasing incompatible hardware that cannot physically fit into the existing door preparations. Field technicians always start with a tape measure before touching a screwdriver.
Standard residential doors typically measure between 1 3/8 inches and 2 inches thick. Most smart locks accommodate this range right out of the box. If your door exceeds 2 inches, you will need a thick door extension kit from the manufacturer. These kits include longer mounting screws and an extended tailpiece to bridge the gap between the exterior keypad and the interior motor. Attempting to install standard hardware on a thick door results in the tailpiece failing to engage the latch mechanism.
The backset is the distance from the edge of the door to the center of the cross-bore hole. Standard backsets measure either 2 3/8 inches or 2 3/4 inches. Most modern deadbolt latches feature an adjustable design to fit both sizes. You simply twist the latch housing to extend or retract it. You must also measure the cross-bore hole diameter. The standard diameter is 2 1/8 inches. If your door has a smaller hole, common in older homes, you need to use a hole saw to enlarge it. Some compact smart locks require adapter rings to sit flush over a standard 2 1/8-inch hole.
Measurement Type | Standard Dimensions | Modification Required If Non-Standard |
|---|---|---|
Door Thickness | 1 3/8" to 2" | Thick door extension kit (longer screws/tailpiece) |
Backset | 2 3/8" or 2 3/4" | Custom latch required (rarely supported) |
Cross-Bore Diameter | 2 1/8" | Re-drilling with a hole saw and jig |
Edge-Bore Diameter | 1" | Chiseling or drilling to widen latch pocket |
Standard single-cylinder deadbolts offer the highest compatibility with smart upgrades. These feature a keyhole on the outside and a thumb-turn on the inside. Double-cylinder deadbolts, which require a key on both sides, are incompatible with retrofit smart thumb-turns due to fire safety codes requiring keyless egress from the interior.
Mortise locks present a massive challenge for automated upgrades. These mechanisms integrate the deadbolt and the latch into a single large metal cassette installed inside a rectangular pocket carved into the door edge. Upgrading a mortise lock requires specialized smart mortise hardware. This hardware is less common, highly expensive, and complex to install. Interconnected handle sets also limit your options. In these setups, turning the interior handle simultaneously retracts the deadbolt and the latch. You must ensure the new smart deadbolt does not interfere with the interconnected mechanics, or you will need to replace the entire handle set.
Multi-point locking systems secure the door at three or more points along the frame. You typically find these on high-end fiberglass or glass doors. These systems have extremely limited smart hardware alternatives. Modifying them often voids the door's warranty and compromises its structural integrity. If you have a multi-point lock, you generally need to contact the door manufacturer directly for compatible smart options.
Automated deadbolts require zero-friction environments. A human hand easily pushes or pulls a misaligned door to force a deadbolt into its strike plate. A smart lock motor cannot do this. If the deadbolt encounters resistance, the motor strains, triggers a false-jam notification, and eventually burns out the internal plastic gears.
Perform the push/pull test before purchasing any hardware. Follow these exact steps to verify your frame alignment:
Stand inside your home and close the door normally without holding the handle.
Do not push or pull the door panel.
Slowly turn the deadbolt thumb-turn to extend the lock.
Feel for any metal-on-metal scraping or physical resistance.
Retract the deadbolt and check for binding.
If you feel any resistance, or if you must manipulate the door to throw the bolt, your alignment is off. You must address weatherstripping interference, hinge sag, or an improperly positioned strike plate before proceeding with a smart lock installation. Fixing hinge sag often involves replacing one of the short screws in the top hinge with a 3-inch wood screw to pull the door tighter to the jamb.
Comparing the two primary pathways for integrating smart technology into existing entryways helps determine the best approach for your specific door setup. Upgrading to Smart Door HardwareDoor Hardware requires evaluating whether you want to keep your existing exterior keys or completely overhaul the locking mechanism.
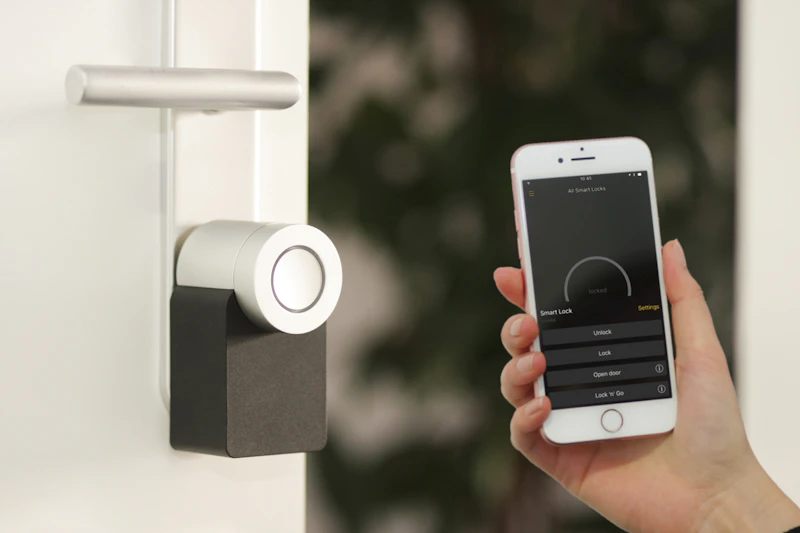
Retrofit models replace only the interior thumb-turn of your existing deadbolt. You retain the exterior key cylinder, the latch mechanism, and the physical keys. The smart mechanism mounts over the interior tailpiece, using a motor to turn the existing hardware. You simply remove the two interior screws holding your current thumb-turn, place the mounting bracket over the tailpiece, and attach the motorized unit.
This approach maintains Homeowners Association (HOA) compliance since the exterior aesthetic remains completely unchanged. It allows you to keep your current keys, eliminating the need to rekey other doors in your home. Installation is fast, typically taking under 30 minutes. However, retrofit locks inherit any mechanical flaws present in your existing hardware. If your current deadbolt is sticky or difficult to turn, the retrofit motor will struggle and drain its batteries rapidly. Additionally, the interior units are often bulkier than full replacement models because they must house the motor, batteries, and manual turn mechanism in one surface-mounted box.
Full replacements require the complete removal of your existing hardware. You install a new exterior keypad or biometric scanner, a new internal motor, and a new latch mechanism. This approach entirely replaces the mechanical foundation of your entryway. You pull the old latch out of the edge bore and insert a brand-new, factory-lubricated deadbolt.
Replacing the entire unit upgrades the physical security grade of the door. It provides a cohesive aesthetic and integrates features like built-in keypads directly into the exterior housing. The internal mechanics are brand new, ensuring smooth operation designed specifically for motorized locking. The drawbacks include a more involved installation process and the potential need for touch-up paint if the new exterior footprint is smaller than the old hardware. You will also need to rekey the new cylinder if you want it to match other exterior doors, which requires a trip to a local locksmith or purchasing a lock with user-rekeyable cylinders.
Feature | Retrofit Smart Lock | Full Replacement Smart Lock |
|---|---|---|
Installation Time | 15 - 30 minutes | 45 - 90 minutes |
Exterior Appearance | Unchanged (Keeps original keyhole) | Completely new (Keypad, scanner, or modern cylinder) |
Key Compatibility | Uses existing keys | Requires new keys or rekeying service |
Mechanical Reliability | Depends on the age and wear of the old latch | High (Brand new factory-lubricated latch) |
Not all doors use deadbolts. Garage entry doors, home offices, and commercial glass doors often rely on standard lever locks. Smart lever locks replace the entire handle assembly, integrating the locking mechanism directly into the lever. These units house the batteries in the interior handle and the keypad on the exterior handle.
When evaluating smart lever locks, you must determine the specific handing requirements of your door. Doors are classified as left-hand, right-hand, left-hand reverse, or right-hand reverse. Stand on the outside of the door. If the hinges are on the left, it is a left-handed door. If the hinges are on the right, it is a right-handed door. While many smart levers are reversible, some require you to specify the handing during purchase. Installing a non-reversible lever backwards results in the keypad facing the wrong direction or the handle operating upside down.
Aligning hardware specifications with your security needs and smart home infrastructure ensures long-term reliability. The technology powering the lock dictates how it performs daily. You must match the communication protocol and physical durability to your specific environment.
The communication protocol dictates how the lock interacts with your network and heavily impacts battery consumption. Direct-to-router Wi-Fi connections offer remote access without additional hubs. This makes them ideal for standalone installations where you just want a single smart lock. However, Wi-Fi chips require significant power to maintain a connection to your router. Wi-Fi locks drain batteries quickly, often requiring replacements every three to four months.
Z-Wave and Zigbee protocols require a compatible smart home hub to bridge the connection to your router. These protocols use low-energy radio waves to communicate. They offer superior battery life, often lasting over a year on a single set of batteries. They also allow for local control independent of cloud servers. If your internet goes down, local automations still function perfectly.
Bluetooth provides proximity-based control directly to your smartphone. It boasts the lowest battery drain but lacks remote access capabilities. You cannot check the lock status or let someone in while away from home unless you add a supplementary Wi-Fi bridge plugged into a nearby wall outlet.
Matter and Thread represent the emerging interoperability standards. Thread creates a low-latency mesh network, while Matter ensures cross-platform compatibility across Apple, Google, and Amazon ecosystems. This combination offers fast response times and extended battery life without locking you into a single smart home brand. Thread border routers are built into many modern smart speakers, eliminating the need for standalone hubs.
Smart locks must withstand physical attacks and harsh environmental conditions. The American National Standards Institute (ANSI) and the Builders Hardware Manufacturers Association (BHMA) grade locks based on durability and security. Grade 1 represents the highest commercial and residential security level, tested to withstand one million cycles and heavy physical impacts. Grade 2 is standard for residential entryways, offering solid protection against forced entry. Grade 3 is suitable only for secondary or interior doors where physical security is less of a concern.
Exterior hardware exposed to extreme weather requires a strong Ingress Protection (IP) rating. An IP65 rating ensures the keypad or scanner is protected against dust and direct rainfall. Hardware without adequate weather sealing suffers from internal corrosion, leading to unresponsive keypads and premature motor failure. Always check the operating temperature range if you live in an area with severe winters or extreme summer heat.
Most smart locks operate on four standard AA batteries or CR123A lithium cells. Some newer models utilize proprietary rechargeable battery packs. Extreme cold significantly impacts battery performance. Alkaline batteries experience severe voltage drops in freezing temperatures, causing the lock to report a dead battery even when fully charged. Lithium batteries maintain their voltage much better in cold climates, making them mandatory for exterior hardware in northern regions.
You must consider fail-safes for when the batteries inevitably die. Many full-replacement locks include a hidden physical key override behind a faceplate. Keyless models often feature exterior 9V battery jump-start terminals located at the bottom of the keypad. By pressing a standard 9V battery against these two metal terminals, you provide enough temporary power to enter your PIN, unlock the door, and replace the internal batteries.
Moving beyond manufacturer claims is necessary to address the physical realities of installation. Preparing for common roadblocks ensures you can complete the upgrade without leaving your home unsecured overnight. Field installation rarely goes exactly as the manual depicts.
Extracting old deadbolts requires care to avoid damaging the door veneer or paint. Start by removing the interior screws. If the screws are stripped, place a wide rubber band over the screw head to provide extra grip for your screwdriver. Apply heavy forward pressure while turning slowly. For severely stripped screws, a screw extractor bit is necessary to back the hardware out.
Painted-over faceplates require a sharp utility knife. Score the paint deeply around the edge of the faceplate before prying it off. Failing to score the paint causes large chips of paint and wood veneer to tear away from the door surface when you remove the hardware. Once the screws are out, slide the two halves of the lock apart and push the latch out through the edge bore.
The strike plate on the door jamb is the most critical component of smart door hardware installation. The deadbolt must extend fully into the strike pocket without rubbing against the metal plate or the wood frame. If the existing pocket is too shallow, the motor detects resistance and retracts the bolt.
Use a sharp wood chisel or a rotary tool to deepen the strike pocket. Ensure the pocket is deep enough to accommodate the full throw of the deadbolt, which is typically one full inch. Install reinforced strike plates using 3-inch wood screws. Standard 1-inch screws only bite into the soft decorative door frame. Three-inch screws anchor the strike plate deep into the structural wall stud, significantly increasing resistance to kick-in attacks and preventing the frame from shifting over time.
When installing hardware on a new door or modifying a non-standard setup, manufacturer-provided drilling templates are mandatory. Tape the template securely to the door edge, ensuring it wraps around perfectly level. Mark your drill points with an awl or a center punch to prevent the drill bit from walking across the door surface.
Modifying non-standard doors requires specific tools, including a 2 1/8-inch hole saw, a 1-inch spade bit, a drill jig, and wood filler. When expanding a cross-bore hole, mitigate the risk of splintering wood or fiberglass by drilling from one side until the pilot bit breaks through the opposite side. Stop drilling immediately. Move to the other side of the door, place the pilot bit in the newly created hole, and finish the cut. This technique prevents the hole saw teeth from tearing the veneer as they exit the material.
The interior mounting plate serves as the foundation for the motorized unit. Secure this plate to the exterior hardware evenly. Alternate tightening the left and right screws to ensure the plate sits flat against the door. Over-tightening the mounting screws warps the internal mechanism, causing the tailpiece to bind and the motor to struggle.
Routing the data cable safely through the cross-bore is a delicate step. The cable connects the exterior keypad to the interior circuitry. Route the wire exactly as specified in the manual, usually over the top of the latch cylinder. Pinching or severing this wire between the metal mounting plates causes immediate hardware failure. Tuck any excess wire into the hollow space of the cross-bore before snapping the interior unit onto the mounting plate.
Once physically installed, the lock requires mechanical calibration. This sequence teaches the motor the physical limits of the extended and retracted deadbolt. Initiate the calibration process with the door open. The lock cycles the bolt several times to measure the torque required and establish the end-points. Never run the initial calibration with the door closed, as frame friction will give the motor false readings.
Network pairing follows physical calibration. Ensure your smartphone is connected to a 2.4GHz Wi-Fi network, as most smart locks do not support 5GHz bands. If the initial network handshake fails, perform a hard factory reset on the lock. Move your router or smart hub closer to the door to establish a strong initial connection, then move it back to its permanent location once the firmware updates complete.
Assess your limits before beginning the project. Standard deadbolt replacements on well-aligned doors take under two hours and require only a Phillips-head screwdriver and a tape measure. These are perfect DIY projects for homeowners comfortable with basic hand tools.
You should hire a professional locksmith when dealing with mortise locks, severe frame misalignment, or multi-point systems. Historic doors requiring custom carpentry to adapt modern hardware also demand professional expertise. A locksmith possesses the specialized jigs, routing tools, and mortising kits necessary to modify expensive doors without causing irreparable damage or voiding warranties.
Upgrading your entryway with automated access technology enhances both security and daily convenience. Success relies entirely on prioritizing physical door preparation over software features. A high-end lock fails on a poorly aligned door, while a basic model performs flawlessly in a zero-friction environment. Take a methodical approach to measuring, testing, and installing your new hardware.
Grab a tape measure and verify your door thickness, backset, and cross-bore diameter before ordering any parts.
Perform the push/pull test on your current deadbolt to identify and eliminate frame friction points.
Deepen your door jamb strike pocket with a wood chisel to guarantee unobstructed motor extension.
Install a reinforced metal strike plate using three-inch wood screws to anchor directly into the structural wall stud.
For customers looking for reliable door hardware solutions, Foachi provides a range of door hardware products designed to support different residential and commercial applications. With a focus on practical functionality, product quality, and dependable hardware solutions, Foachi helps customers select suitable door hardware for secure, efficient, and long-lasting door systems.
A: No. Smart hardware requires specific door dimensions, typically a thickness of 1 3/8 to 2 inches and a standard cross-bore hole. Doors with mortise locks, multi-point locking systems, or interconnected handle sets require highly specialized hardware or extensive carpentry to accommodate standard smart deadbolts.
A: Retrofit locks are compatible with standard single-cylinder deadbolts where the interior features a simple thumb-turn. They are not compatible with double-cylinder deadbolts, mortise locks, or low-profile deadbolts where the interior thumb-turn is integrated flush into the door panel.
A: If your door passes the push/pull test and has standard measurements, installation is a straightforward DIY project requiring only a screwdriver. Hire a locksmith if your door requires physical manipulation to lock, has a mortise mechanism, or needs new holes drilled into fiberglass or metal.
A: Smart locks operate on internal batteries, so they continue to function during power outages. If the Wi-Fi goes out, you lose remote access and notifications, but local access methods like physical keys, keypads, and Bluetooth proximity unlocking still work perfectly.
A: In most cases, no. Full replacement smart locks fit into standard 2 1/8-inch cross-bore holes left by your old deadbolt. You only need to drill new holes if you are installing a lock on a brand-new door or upgrading an older door with non-standard, smaller lock holes.
A: A jammed error indicates the motor is encountering physical resistance when trying to extend the deadbolt. This is almost always caused by a misaligned strike plate, a strike pocket that isn't deep enough, or weatherstripping pushing the door out of alignment. Adjusting the strike plate resolves this issue.